Posts

Showing posts from October, 2010

Monkey See Monkey Do

Image
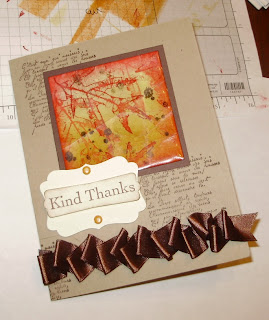
Do you all remember that we have a stamp set of a sock monkey?? I just had to have it when it first came out. Of course then I got the accessories when those came out too. I love my little monkey but hardly ever use it. Well at Wal Mart they have doggie toys that are sock monkeys. I got this for my buddy Trapper. Isn't he cute? He has been sewn a few times. Not that well made but so darn cute! I was inspired to make a card using the same color scheme. Check it out: I gave this card to my friend Becky. She's always making the best cards and sending them to me so I thought I'd send her one for a change. (Hope you got your card before I posted this!) LOL. I love the ghost pumpkin too. I really like how it turned out. Hope Becky likes it too! Happy Stampin'!

Haunted House

Image
This is my Haunted House using the Build a house from the mini catalog. (Cost is $5.95).  The house comes with instructions but I will give you a step by step here: Start by laying out all the pieces. (Those dots are from the sun coming through the blinds. Pay no attention to them. :)) Next you attach sticky strip to all the edges that come together like so: I also added sticky strip to the roof of one piece even though the instructions don't tell you to do it. Here's the piece: I then attach the walls together until it's free standing without a roof. Next the roof goes on. You can see why I put the sticky strip on first. It's better to have a flat surface to lay it on to do that rather than a pitched surface. Next you'll put the back part of the roof. Add the chimney to the back of the roof. The house is done: But wait! It still doesn't look like a spooky haunted house! Oh yeah. These things come white and you have to decorate the

Happy Halloween framed art

Image
Okay here's another easy project you can do with the Decor Elements vinyl rub-ons. I layered Tangerine Tango, Pumpkin Pie and Dafodil Delight cardstock with Basic Black on the sides. I tore the paper to give it a creepy feel. I drew the mansion because I don't have the stamp set that's in the book. I did a pretty good job of copying though. The bats are the punch we sell and the ghosts are a die that I cut out with the Big Shot. Tip: punch out a small black circle and attach to the back of the ghost to make his eyes black. Easy peesy. After you make background and insert it into the frame you line up the Decor Elements that says Happy Halloween on the glass and rub it on. You're done! This is a great Halloween art piece that can be used year after year. Come back tomorrow to see my Haunted House. It'll make you scream!

Don't Leave Your Camera Laying Around

Image
Here are some random shots that my girls took while I was busy. I don't remember them having my camera so they must have found it laying around. This is just a sampling that I found on the camera when I downloaded pictures. There are some strange pictures. My bed not made, vents, more stuffed animals, the trophy mounts that my husband has around the house. Here's something a little more normal. I made this card for Steve's cousin who's baby was baptised a few weekends ago. I used the modern label punch to make the cross. I reallly should get a stamp set with a cross in it. But this worked just fine. Okay gotta run. More later.

Finished my Halloween Tree

Image
Just in time too! Now I can put some fun treats for the girls inside the cones. Here's the finished tree: Close up of a cone: Close up of a tag: I made 12 for the 12 days of Halloween but since I didn't start the count down until today I left 12 off the tree. My girls came home from school and noticed all the cones on the tree right away. They wanted to know if they could look inside the cones. I told them they had to start with 11 and then the next day they could do 10, then 9, then 8, etc.  So they opened up 11 and there were two bouncy balls with spiders inside them. They loved them! Tomorrow they'll be able to have candy ones since it's Friday. I only let them have dessert or candy on nights that aren't school nights. Otherwise they can't fall asleep very well. If you bought my paper pack sampler you can make all 12 cones with it. Do you want me to show you how easy it is to make these? Send me an email and we'll get together and I'll show

Girl Scouts and a visit to the Water Treatment Plant

Image
So I told you I would tell you more about my trip to the water treatment plant. I had my troop go to Utilities plant for a field trip on Tuesday. They were very prepared and had a lovely visit planned for everyone. More than our troop was there and it seemed like a good turn out. There were four stations. The first station was about conserving water. He handed each girl a penny cut in half to show how much a gallon of water costs. Then he talked about saving water and checking for leaks in the toilet. We'll be trying the food die in the toilet tank test for sure. Then we all ate hot dogs and hamburgers. After that we got to see what was inside the huge tank. Look: Nope, it's not chocolate milk. The tour guide told us how he had fell into a tank like this somewhere else. They keep life jackets right next to the tank. This is were they put water after it's been filtered but still needs to be cleaned by the "bugs". So this tank has millions of microscopic bugs

Super busy but having a ton of fun

Image
I can't tell you everything that's been happening in my life because really you all don't want to read a book do you? LOL.  But I will tell you that I've been dealing with sick kids, going to concerts, hubby's birthday, Stamp classes, clubs, girl scout field trip, laundry, cooking, taking care of pets, planting mums. You get the idea. Well tonight I realized that I need a bigger house. I had 12 ladies here for dinner and stamping and I had no where to put everyone. So Vanessa and I stood up to eat and then I think my poor husband took pity on us and got some camping chairs out of the attic. He's a God send. He cooked the hamburgers for us and everyone else brought yummy side dishes. I won't need to shop for food for a week! Here's the card we made tonight: We did the cracked glass technique. Everyone had fun and for the most part it was a simple card. It was just the waiting around for stamps or ink that took some time. I'll post more about

I'm getting free Rubbah!

Yesterday was a challenge to all demonstrators to book workshops. Easy enough. Well the thing was that if all demonstrators as a whole booked 5000 workshops in one day then we would get a free stamp set from the Mini Catalog that is coming out in Janurary. This is a stamp set that I've never seen before and isn't for purchase until Janurary. So do you know how excited I was when they announced that we booked 5500 workshops!!! Very!!!! LOL.  Just think, if you were a demonstrator too and had booked one workshop yesterday you would have been able to get a free stamp set too. Cool stuff like this happens all the time so if you are thinking about becoming a demonstrator visit my page that's all about joining my team. Click here: Join My Team Here is a few other things that we got from the challenge. Plus my name is in a drawing for a $100 Stampin' Up! shopping spree.  "The names of all participants will be featured in a future current update. Participants will a

Pink is Pretty

Image
For my friends that have had to deal with Breast Cancer or know someone who has I decided to make a card using our Ribbon of Hope. This card uses the Big Shot embossing folder Vintage Wallpaper. I love the glimmer brads too. I hope you feel inspired to go out and donate to someone you know who is walking in a marathon for this cause. I have a friend that does the Susan G. Komman walk every year. Here's her link to donate: Donate for the 3 day walk She also has a blog: Glued to Paper Well I gotta run. I'll post again soon.

Thanks Giving Card

Image
I thought you might like to see the card I had the residents at Kay's work make. I'm posting this before the workshop so I'll have to let you know how it goes later. Here's the card: I used the French Foliage stamp set, big buttons from the mini cattie, Seasonal Sentiments, Kraft Crumb Cake cardstock, Cherry Cobbler, Old Olive and Whisper White cardstock and some twine. Ink is same colors as paper plus Early Espresso. Hope you like it. I'll write more later.

Owl for you!

Image
Hey stampers, I just wanted to do a quick tutorial on using the new Owl Punch.  See there's these teeny, tiny circles to use for the eyes. Yes, they are there. I'll wait while you put your glasses on. Okay, so you might be thinking, "This is CRAZY! How do they expect me to put these tiny dots on there???"  Well I found out a trick that makes it so super easy you are going to say, "Jackie is great! Jackie is great! Jackie is great!" (And mean it. LOL). So here's the tutorial:  These are the cute owls I made and below is the punch. See all the circles? I'm sure that we need them all. LOL. Punch several of the owls out in a solid cardstock and then in a DSP. Get creative and do something wild! Use red and green or orange and purple. Anything you want! I used Chocolate Chip and River Rock DSP. Next you will find the two smallest holes on the punch and punch them out of the solid color cardstock. Make sure they are close to the edge but not

Check your emails!

Image
I had someone tell me today she didn't know about my Christmas Card Class being moved to the first Sunday of the month. She didn't check her email so she missed out on making this gorgeous card. Lookie: Sorry Deb! I'll call you next time. Flora was my only attendee and we had a great time designing this card. She helped me pick out the base color. I love it and was glad I could finally use my Marina Mist paper I bought. We also used the brayer, blender pens and sponges. After making the 10 Christmas Cards we made up a card that my Girl Scout Troop can help put together and send to the troops overseas. We used the Build a Bear stamp set. I'll show you a picture tomorrow. Well I'm off to bed. If you still haven't paid me for the Simply Adorned class call me or email me. I'm placing the order tomorrow. 'Night!

Spooky Pumpkins

Image
Here's a great decorating idea that's easy to do. Buy some white craft pumpkins and then use our Decor Elements Spooky Things $14.95 (pg 8) in the Mini Catalog with some Desinger Jewels, Black Flourish $4.95. I used one pack of the Jewels and one pack of the DE. I actually have a lot of images still left over from the DE. So I can make a few more projects with it. I used the Waffle Paper and Raven Lace to make the tag along with the stamp set Batty For You $23.95 I'm working on making the 12 days of Halloween from our DSP in the big cattie. So check back and see what I come up with. Happy Stampin'!

Looks like a crime scene!

Image
Just look at the floor of my office! This is what happens when you have to prepare for a Big Shot Class that 8 people are coming to. Luckily no one was harmed during the making of these cards. LOL. Look at the cards I designed using the XL Die called O Christmas Tree. Front of card: Inside of card: Big Shot stuff I used: Spider Web embossing folder, O Christmas Tree die, Scallop Circle #2,Timeless Type Junior Alphabet Punches: Large Oval, Modern Label, Word Window I also made a Christmas one: Francesca made a delicious dinner for us to eat and provided a pitcher of margaritas from her hubby's restaurant The Poor Mexican. Yummy!  Everyone one had a good time making the card but it was definately more advanced then the average card I usually have people make. I was sort of showing off for Francesca since she's always making her cards look better than mine. LOL. Don't forget to sign up for my Simply Adorned class. It's a great deal and perfect for giving to