Posts

Showing posts from December, 2010

Happy New Year!

Image
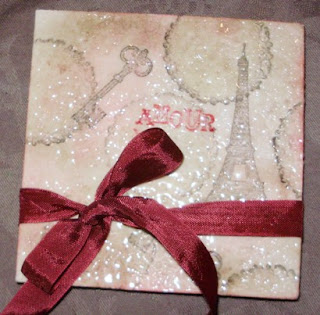
My Big Shot Club held a black and white party on Wednesday night. It was a lot of fun and we made a very elegant card using just black and white. Francesca was nice enough to hold the class at her house. She also made these beautiful invitations for the class. I love the striped ribbon and how we did the embossing with the ink in the recessed areas. The Smooch on the glasses is very pretty too. I'll post a picture of the card we made tomorrow. Happy New Year!!!

Merry Christmas!

Image
I hope you all had a wonderful Christmas and enjoyed spending time with family and friends. I feel so blessed to have the life I do. This Christmas I realized that I don't need to spend a ton of money on gifts. In fact I enjoyed making gifts this year. Those that got a handmade gift really appreciated it. I wish I could have done more for my two children but thanks to a very generous neighbor my kids got the DS they wanted. (Thank you Melanie!) Words can't describe how I feel. I know that God has blessed me with my friends here in Alabama. I have met such wonderful people and really feel that I've come home. With all that was going on before Christmas I didn't get a chance to post any pictures of the projects I made. So here's the card I made for the priest at our church. I used the Big Shot Cake pop up card die. It was the center circle only and I added candles for the four weeks of advent. Then I made the center candle white. I used the two step bird punch

Custom Cards

Image
So this is the time of year for thinking of those who aren't normally recognized. Like the mail person, teachers, the bus driver.  I know my kids bus driver has to deal with a lot on that bus. Crazy things happen on school buses. LOL.  So to recognize all that she does I made a custom card just for her. I love this stamp set! It's in the big catalog on page 65 called Every Little Bit. I think this set would be great for doing inserts for the Simply Adorned too. I got this set finally in the clear and I love how easy it is to use it. I wish it was all in one case though. It comes in two cases but  I think I figured out how to get them all into one case. You can pull out the paper inserts that tell you the name of the stamp set and show pictures of each stamp. Well just put one on the back and leave one on the front. So easy I'm sure. Will have to try it. Amanda is having her birthday party today. Hope it doesn't rain. It's going to be cold though. Bundle up co

Scrapbooking with My Digital Studio

Image
Just finished playing around with MDS. Lookie what I made. This took me about 40 minutes to do. I'm still learning how to use it. These pages had photo layouts that you just click and drag photos into but I added mats, background paper and text. If you want to see a video about MDS check out my Stampin' Up! website. Click Here

Easy gifts for Christmas

Image
Okay so I found this idea on another blog but it's so easy I had to try it. Handmade Ornaments! What you'll need: Clear Glass Ornaments Embossing powder Heat Gun Embossing buddy Versamark Ink Stamp set Scissors Window sheets circle template (I use the lid to our brads case) Glitter Directions: Use the Embossing Buddy on our window sheets. Take a stamp of your choice and ink it up with Versamark Ink. Stamp on our window sheet. Emboss with Silver or Gold embossing powder. Flick the back to shake of excess powder. Then heat with heat gun. Trace outline with the lid of a brad container around your image, leaving a lip at the top. You'll then cut out that line to make a circle with that tab sticking up at the top. Roll it up and insert it into the glass ornament. Add some glitter glass, fake snow or both. Attach a hand stamped tag and some ribbon and give it as a gift to teachers, bus drivers, coaches, mail people, etc. They'll love that it&

Love to stamp!

Image
I love my business!!! I had a fun day yesterday with mostly my downline. Becky came too but continues to rebuke me when I ask if she wants to join. Sigh. We made Christmas tags and a cute little box for them to go in. I had some difficulty with the lid to the box but finally figured it out. I think they turned out cute but unfortunately I didn't take a picture of any of the tags. I also have been making Happy Belated Birthday cards. Why don't I just make Birthday cards? Well I'm always late sending them. So here's one of the cards I made. I love how it turned out. So did Becky. Hee hee. I guess I can send her one early for her birthday. LOL. Gotta run. Lunch with some friends. All you can eat Sushi. Yum!!!!

My Cowgirl did so good today!

Image
Today Amanda was able to ride in the rodeo. She also had a new outfit that Grandpa gave her for her birthday. She looked so cute! I'm so proud of her too. The first few events she needed help but for the poles she told Danielle that she could do it herself. Not only did she get Ginger to listen to her she actually rode great and did the fastest personal time. She didn't get a ribbon for that event but she did get FIVE ribbons! Here's a picture of her with her ribbons: That's her first 2nd place ribbon! Soooo cool! She also got 3rd place in the musical squares. Actually she was the first to get out and Mr. Chris asked the other girls if it was okay for her to get a second chance. They all raised their hands to agree to it. Sooo sweet of them! Her other ribbons were for 4th and 5th place in the Relay Race and the Ribbon Race. Both of those she had a partner and had to either hand the baton to the other rider or hold one end of a ribbon while racing around a barrel.

This is why you should have the Catalog and IDEA Book

Image
So my friend Francesca came over tonight and helped me put my babies to bed. Steve is hunting which means it's a great time for having friends over to stamp late into the night. :) I like surfing blogs and websites for ideas on cards. Well I often forget that our catalog is also an idea book. If I ever get stumped I can flip through the pages and see if any of the layouts catch my eye. Francesca loved the tile I made today. Lookie: I embossed it with glossy glaze embossing powder after I stamped it. It's so shiny. I love how it turned out and so did Francesca. So I told her she could make one too. After we played around with ideas we found a great layout on page 122. She even liked the colors. After making the tile she wanted to make a card too. So we took out the Kraft I mean Crumb Cake cardstock, Whisper White Cardstock, water color crayons, aqua painter and a couple punches. Look what we made: It's so pretty! The flowers are on dimensionals too. Here's the

SUO Challenge 7

Image
Okay I can't take credit for this lovely design but I did make it myself. Hee hee.  I love the clean look of this and I think it makes a great make n take for workshops. In fact I may have my ladies at the nursing home do this card next. We get together once a month and stamp cards for an hour. The ladies love it and I enjoy spending time with wonderful women who have so much to still offer others.  Here's the card:  I used the two step bird punch, dimensionals, Cherry Cobbler Cardstock, Peace on Earth Level II stamp set, Always Artichoke Ink, Cherry Cobbler Marker and Whisper White Cardstock. This was very easy and looks great! I had a very busy weekend with Girl Scouts. My two girls rode in the Christmas Parade Saturday night. Look how cute they are: Jessica took that last one. LOL. Here's an early Christmas present to myself for being so good this year.  A Decor Element for my stamp room. It took some time but was really very easy and the lettering is

Oh Christmas Tree!

Image
I bought a styrofoam cone the other day hoping to get a chance to make a paper tree for Christmas.  Today my wonderful husband, Steve, started putting lights up on the house. I thought it was a great time to figure out the paper tree. He thought it was a good time for me to go outside in the cold and help with the decorations. I did not agree. So I stayed inside where it's warm and made this. I used Love Letters DSP. I used three sheets but I ended up with a little left over.  The ribbon is Cherry Cobbler seam binding and Crochet Lace. That's it. To start you need to cut the paper into 1" strips. After that you cut them into 4" pieces. To attached the strips to the cone use straight pins.  I folded over the strips and pushed the pin through it.  Layer around the cone in rows. I used one type of DSP pattern for the whole row then changed to a different pattern the next row and so forth until I needed to repeat. If you want to make this tree let me know. M

It's beginning to look a lot like Christmas!

Image
So this morning my kids go outside and the birdbath is frozen. Clue number one that it's getting closer to Christmas. Jessica keeps asking us to put up the Christmas Lights. Clue number two. What's the last clue? The advent countdown has begun! Here's where I hung my countdown boxes. I still need to decorate the mantel but I got these up and I'm ready to put fun treats and crafts inside them. My friend Vanessa came up with a great list of ideas for her boxes. When she gives it to me I'll post it on my blog. I've been trying to get my build a house ready for the class I'm doing on the 19th. Here's how it looks today. I may add more to it. I made curtains from our fabric and used the now sold out DSP called Candy Lane. So if you want to decorate your house like mine you'll have to come to my class. Hee Hee. One of my friends and newest downline had her first workshop last night. We had a fun time and had delicious tortilla soup. She got a fe